Integrate AdminLTE in Laravel Complete Guide
Last updated on June 14th, 2021
This's a complete guide to integrate AdminLTE in Laravel. A big help for web developers like me that is not a (pro) front-end developer. This is for you if you want a responsive web app template and you don't want to start from scratch. Thanks to AdminLTE, a popular open-source web app template that will help you create interfaces such as admin dashboards and control panels.
Steps to Integrate AdminLTE in Laravel
This is a two-step guide with sub-steps that will walk you through to install Laravel using Composer and integrate AdminLTE in Laravel.
The following steps use the Composer dependency management to easily integrate AdminLTE in Laravel.
Step 1: Install Laravel Using Composer
Before we integrate AdminLTE in Laravel, we first need to install Laravel on our server. Remember that Laravel framework has few system requirements. If you’re not using Laravel Homestead then you need to make sure that the following has already installed on your server.
- PHP >= 7.1.3. Open a terminal and check your PHP version by typing php -v command.

- PHP extensions required are OpenSSL, PDO, Mbstring, Tokenizer, XML, Ctype and JSON. Type php -m command to list all PHP extensions.
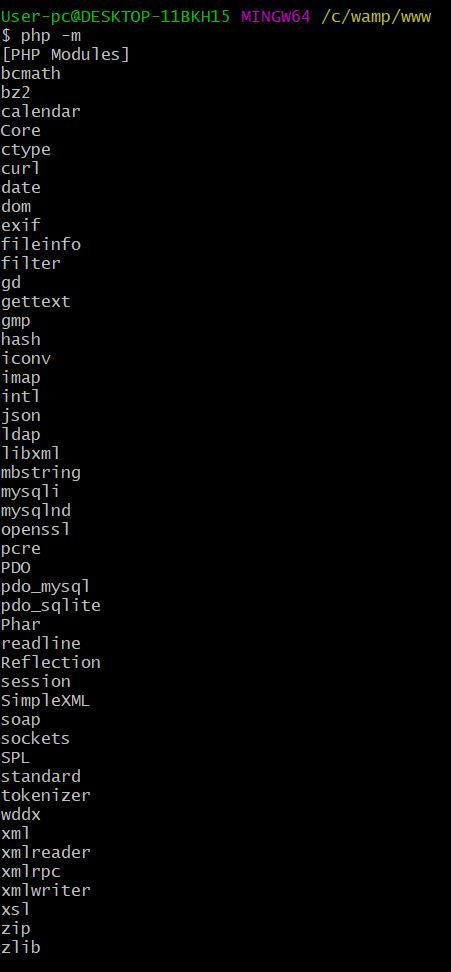
a. From your terminal, navigate to directory where you want to install Laravel.
b. Create your Laravel project using the composer create-project --prefer-dist laravel/laravel command. Composer will install all Laravel's necessary files.
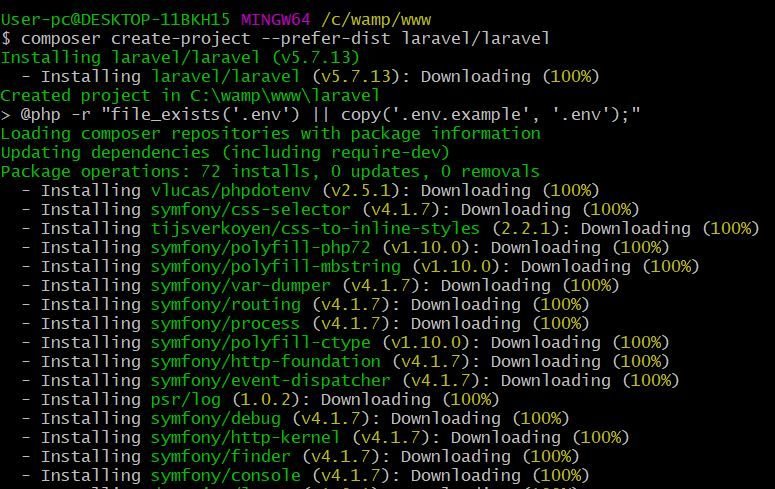
Installation should end with a message Application key set successfully.

Open a browser and navigate to your project URL.
If the page displays Index of Laravel instead of Laravel's welcome page then perform the following.
If you have PHP installed on your server to serve your project then you can start your Laravel project by executing php artisan serve command; Else just move index.php and .htaccess file from your public folder to project main folder.
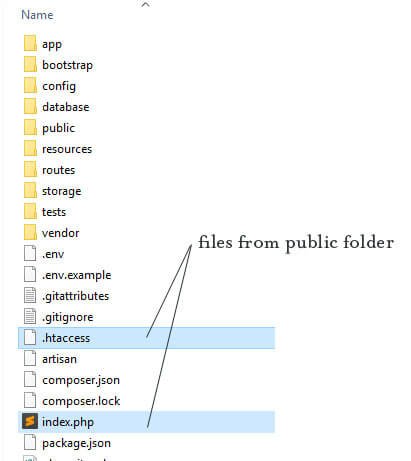
Open index.php and replace require __DIR__.'/../vendor/autoload.php'; with require __DIR__.'/vendor/autoload.php'; and $app = require_once __DIR__.'/../bootstrap/app.php'; with $app = require_once __DIR__.'/bootstrap/app.php';
Save and close the file. Go to your browser and reload your page. Now, you should see Laravel's welcome page.

Step 2: Integrate AdminLTE in Laravel Using Composer
a. From your terminal, type the command composer require jeroennoten/laravel-adminlte to easily download AdminLTE necessary files.

b. Open config/app.php and add this line to Service Providers.
JeroenNotenLaravelAdminLteServiceProvider::class,
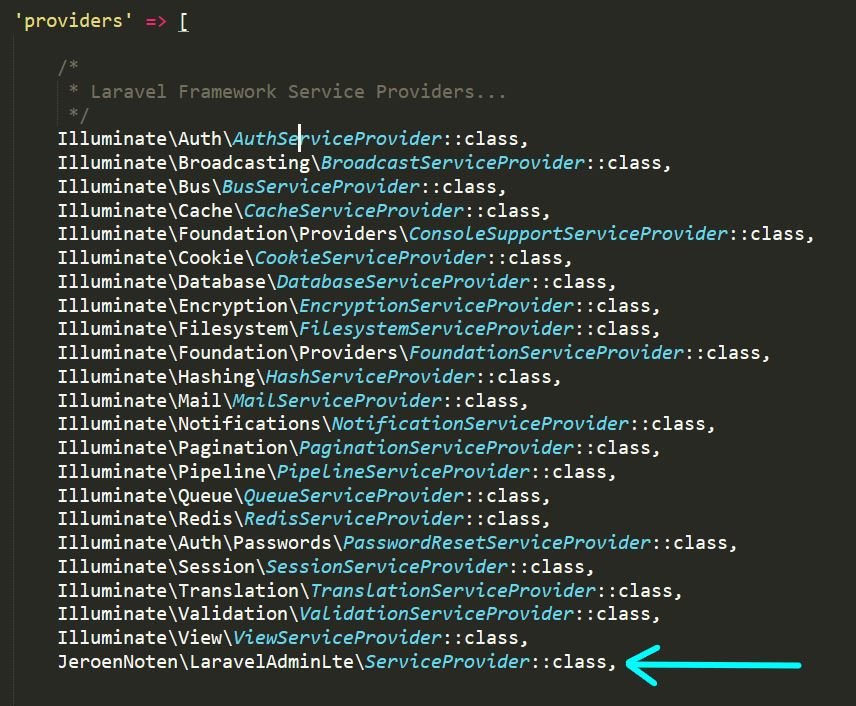
c. Run php artisan vendor:publish --provider="JeroenNoten\LaravelAdminLte\ServiceProvider" --tag=assets command to publish your public assets.

d. Run composer update jeroennoten/laravel-adminlte command to update AdminLTE package.
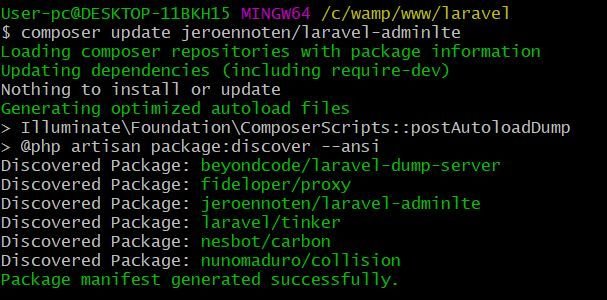
e. Run php artisan vendor:publish --provider="JeroenNotenLaravelAdminLteServiceProvider" --tag=assets --force command to overwrite existing files.

Good Job! You've integrated AdminLTE in Laravel successfully. To appreciate AdminLTE's admin panel beautiful design you may install Laravel's authentication package.
Step 3: Install Laravel's Authentication Package
This step is optional.
a. Run php artisan make:adminlte command to easily download Laravel's authentication package. It is same as make:auth but uses the AdminLTE template.

b. Run php artisan vendor:publish --provider="JeroenNotenLaravelAdminLteServiceProvider" --tag=config command to publish the configuration file.

You can now edit config/adminlte.php to configure your logo, skin, layout, sidebar, menu, and many more.
Go to your browser and reload your page. Now, you should see Laravel's login page.
Common Issues When Trying to Integrate AdminLTE in Laravel
AdminLTE CSS Path Not Working
Google Dev Tools throws an error Failed to load resource: the server responded with a status of 404 error for some css resources.
Fix the issue by appending public/ to all assets URL. Here's the list of files to update.
- views/auth/passwords/master.blade.php
- views/auth/passwords/login.blade.php
- views/auth/login.blade.php
- views/auth/register.blade.php
- views/auth/verify.blade.php
PHP Artisan Migrate Error
After running php artisan migrate command it throws an error Syntax error or access violation: 1071 Specified key was too long; max key length is 1000 bytes.
To fix the issue you have to edit app/Providers/AppServiceProvider.php file. Inside boot function set a default string length by adding this line Schema::defaultStringLength(191);. Now boot function should look like this.
public function boot()
    {
        Schema::defaultStringLength(191);
    }
We hope this topic on integrating AdminLTE in Laravel helped you create your responsive web app without starting from scratch.
If you want to develop your Laravel app as a single-page application (SPA) where you can perform CRUD (create, read, update, delete) operation, follow our guide here on Laravel Vue JS CRUD SPA (Single-Page Application) tutorial.


You are a genius, am a malawian living in south africa an aspirant full stack web developer and working with on of technology companies and I thank you for saving my job.
Followed your blog and am really really so happy and thankful for detailed way of installing this to my site.
I appreciate to blogger for wonderful post. will definitely share this blog to my group.
Trying the , Step 3: Install Laravel’s Authentication Package
but there is error like : Command “make:adminlte” is not defined.So unable to install authentication package.Could you please suggest any solution.
php artisan make:adminlte
the above line is not working.
Wow marveolus, can you make it as well for AdminLTE v3?
Currently creating tutorial — Laravel Vue JS CRUD Single Page Application. This will include installing AdminLTE 3. Stay tuned!
while trying to run “php artisan vendor:publish –provider=”JeroenNotenLaravelAdminLteServiceProvider” –tag=assets”
i’m getting error like “In ProviderRepository.php line 208: Class “JeroenNoten\LaravelAdminLte\ServiceProvider” not found”
Hi Ksv,
I missed adding backslash.
I have updated the command above, can you try it out again?
I changed to ““JeroenNoten\LaravelAdminLte\AdminLteServiceProvider” “
When run
1. php artisan vendor:publish –provider=”JeroenNoten\LaravelAdminLte\AdminLteServiceProvider” –tag=config
OR
2. php artisan vendor:publish –provider=”JeroenNoten\LaravelAdminLte\AdminLteServiceProvider” –tag=assets
shows
Unable to locate publishable resources.
Hi Hector,
After the last backslash, it should be “ServiceProvider”, not “AdminLteServiceProvider”.
Let me know if it works!
In step2, we add “JeroenNoten\LaravelAdminLte\AdminLteServiceProvider::class,” or “JeroenNoten\LaravelAdminLte\ServiceProvider::class,”