Launch WordPress Site on Bluehost 2021 Ultimate Guide
Last updated on April 28th, 2021
Here we're going to share with you our comprehensive guide to launch a WordPress site on Bluehost. We'll walk you through the basic steps before and after you deploy a WordPress website. Also, we'll suggest tools you can leverage to easily put your WordPress site live on Bluehost.
Requirements
- Your WordPress site
- Credit Card for payment (another payment option is through PayPal)
Step 1: Before you Launch WordPress Site on Bluehost
Before search engines crawl your site and visitors access your pages, you want to make sure that your site is ready in terms of speed, SEO, and security.
We're suggesting you remove unnecessary things that might slow down your website. Those things that make your site heavy. You might consider removing the following before you launch your WordPress site.
- Unused plugins (also take a minute to update your outdated plugins)
- Empty pages and/or posts
- Non-active Users
- Unused resources (most commonly images)
Images you're using in pages and/or posts must be optimized; use compressor.io or tinypng.com to reduce the file size of your images. Also, remember to put alt and description for each image you're using for SEO purposes.
Your pages and/or posts copies should be SEO-friendly. Additionally, they should be easy to read and understand. Most importantly, they must be unique and valuable. Install Yoast SEO plugin for interactive SEO analysis.
It is a must to set up security and firewall for your website. Setup All In One WP Security & Firewall plugin to tighten your site security.
Step 2: Backup your WordPress Files & Database
To easily launch your WordPress site on Bluehost (later in Step 4), we suggest you use All-in-One WP Migration plugin to backup your WordPress site (both files and database). Install All-in-One WP Migration plugin and use it to export your whole site to a single file (refer to screenshot below).
In case you're restricted to use a plugin, you can always manually backup your WordPress files and database. You may follow our steps here if you're more comfortable to manually migrate your WordPress site.
Don't skip this step of backing up before you launch WordPress site on Bluehost.
Step 3: Sign up on Bluehost & Select Your Plan
We want to share you this coupon here from wpbeginner to get 63% off Bluehost's popular hosting.
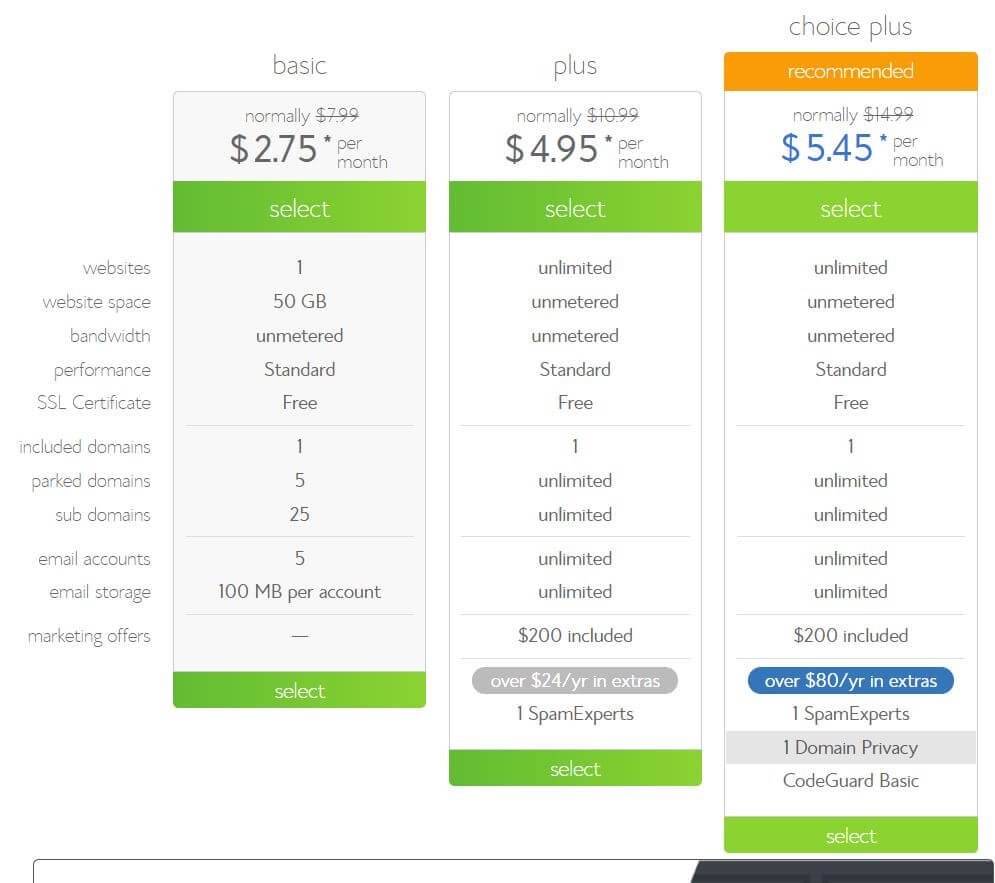
Click the coupon code to take you to Bluehost's special offer. Then, click Get Started Now and select your plan.
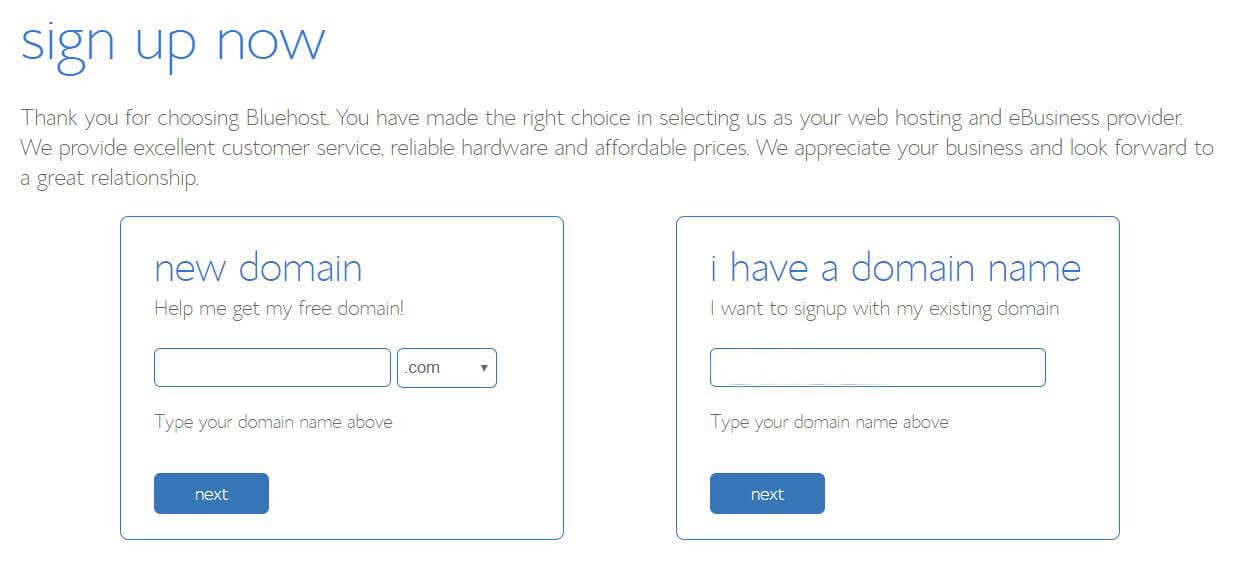
A. Sign up on Bluehost for your domain.
Bluehost will check if your requested domain is available.
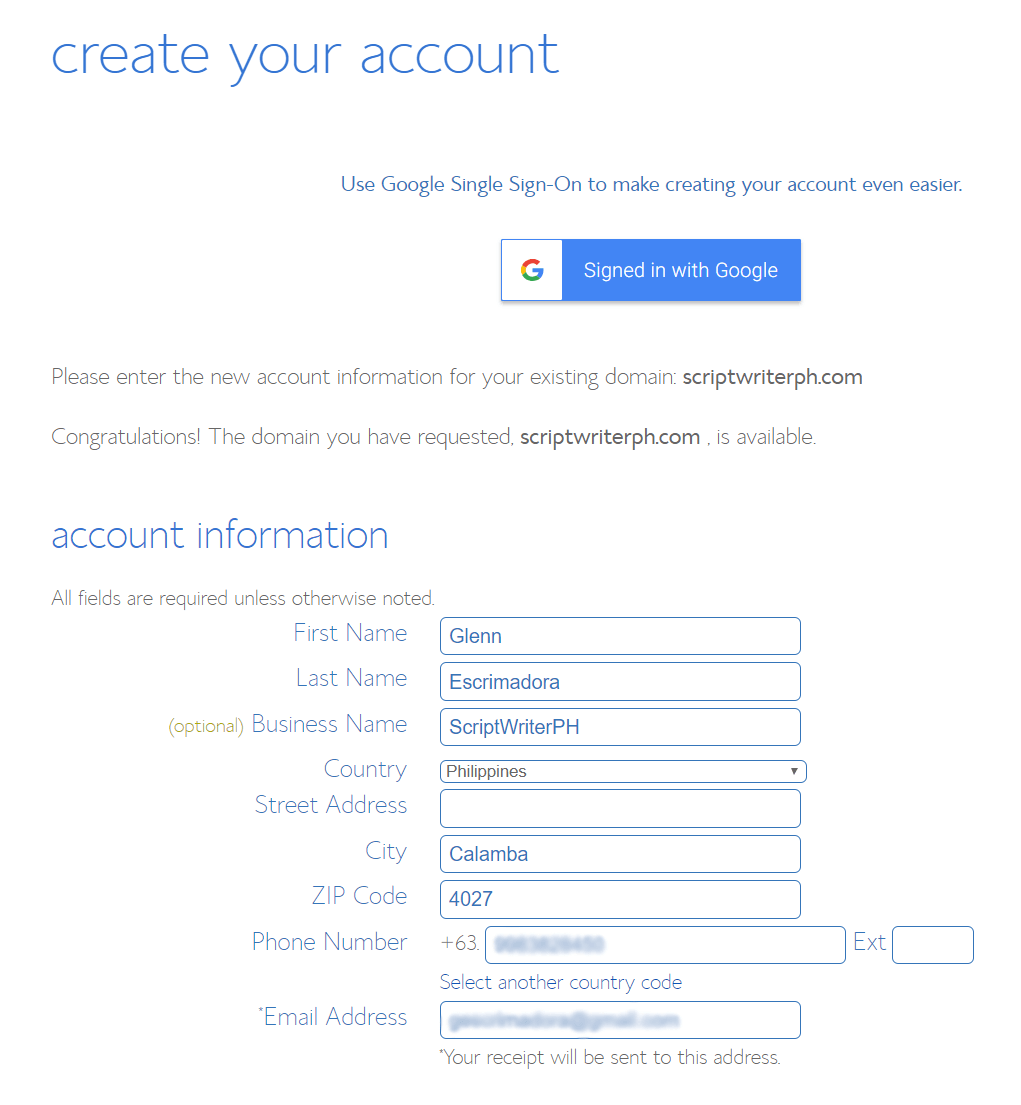
B. Create your Bluehost account.
Fill up the account information form.
From package information form, choose your account plan. Since we're using wpbeginner coupon, we should see a $2.75/month offer which is 63% off their popular hosting.
Select some offers (optional) from package extras if you want additional services from Bluehost such as Security and SEO tools.
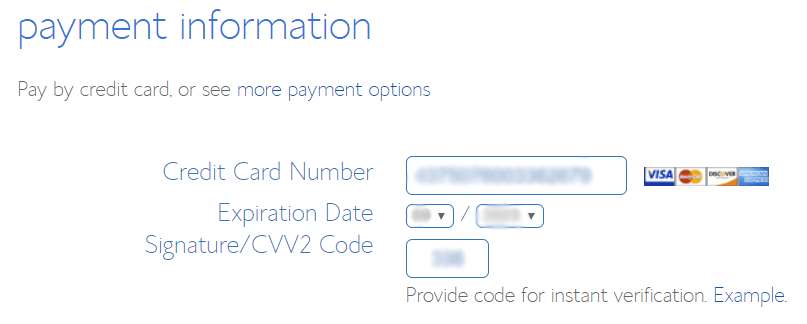
Provide your credit card details from the payment information form. Remember to check all the data you've entered in all forms.
Read and agree to Bluehost's Terms of Service and Cancellation Policy.
Now click the Submit button.
The page will redirect you to your purchase details.
Create a secure password for your Bluehost account.
Sign in on Bluehost and prepare to launch your WordPress site.
Let's proceed to the last step!
Step 4: Finally, Launch your WordPress Site on Bluehost
Sign in on Bluehost to perform the following steps.
A. Setup Database from cPanel.
Go to Databases under Advanced tab (located from left sidebar). Enter your database name and click Create Database button.
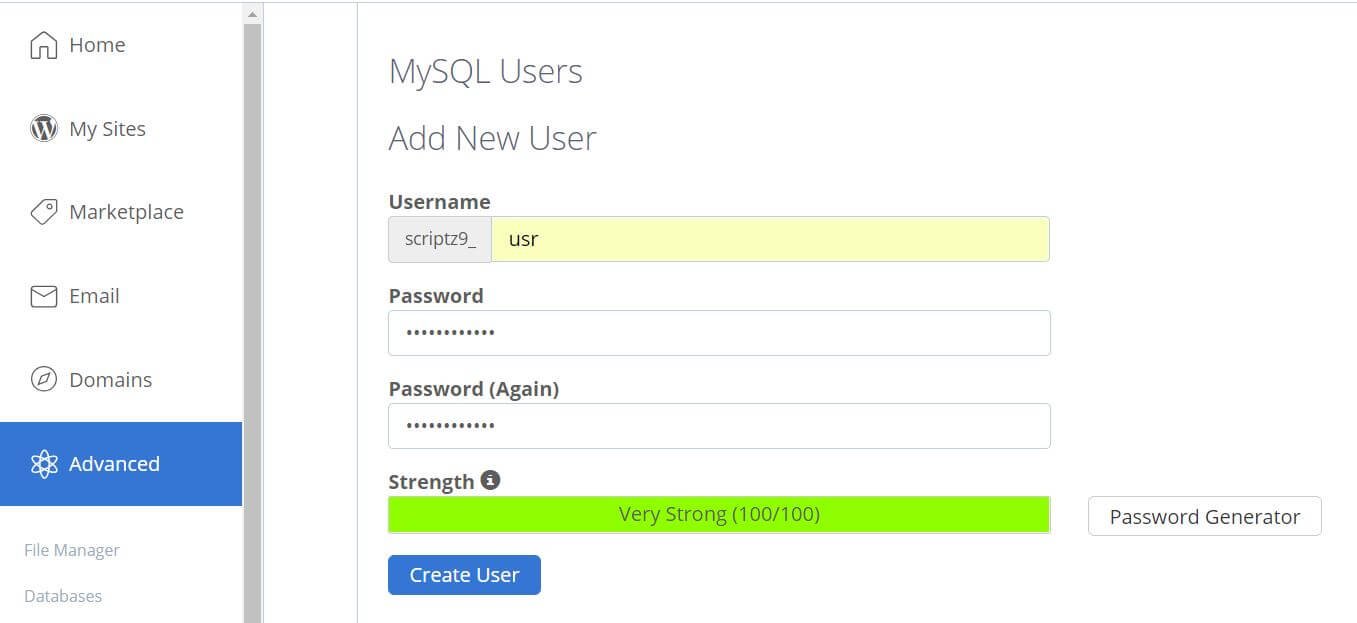
After successfully creating a database, you need to create a MySQL user -- it'll manage your database. Scroll down to the section Add New User. Fill up the necessary details and click Create User button.
Lastly, scroll down to the section Add User To Database. Go to all available privileges by clicking the Add button. Check ALL PRIVILEGES and click Make Changes to grant privileges to your database user.
B. Install a fresh WordPress site.
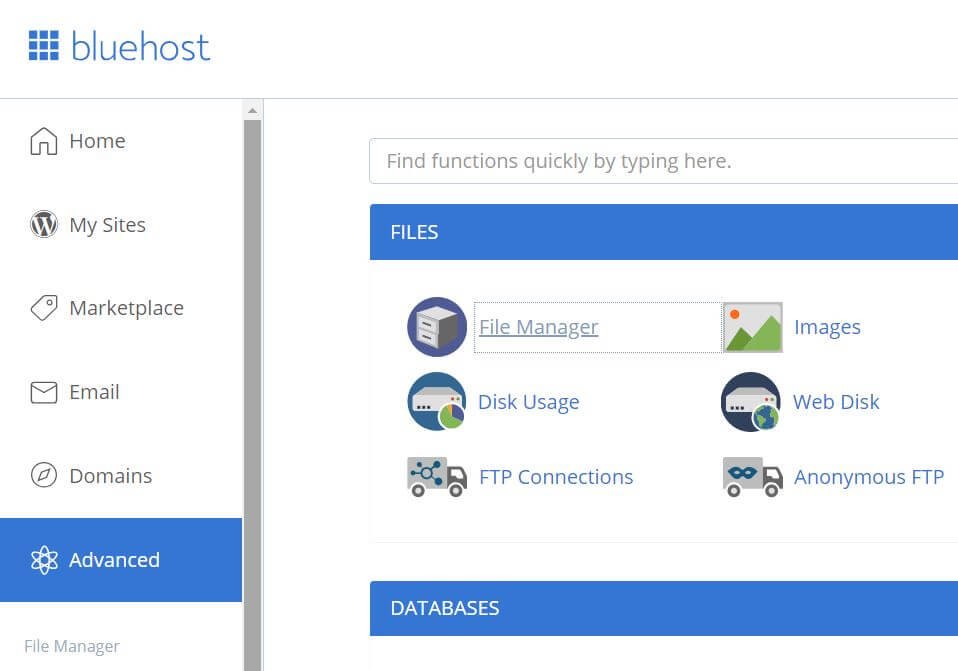
Download the latest WordPress from wordpress.org here. Then, go to File Manager under the Advanced tab.
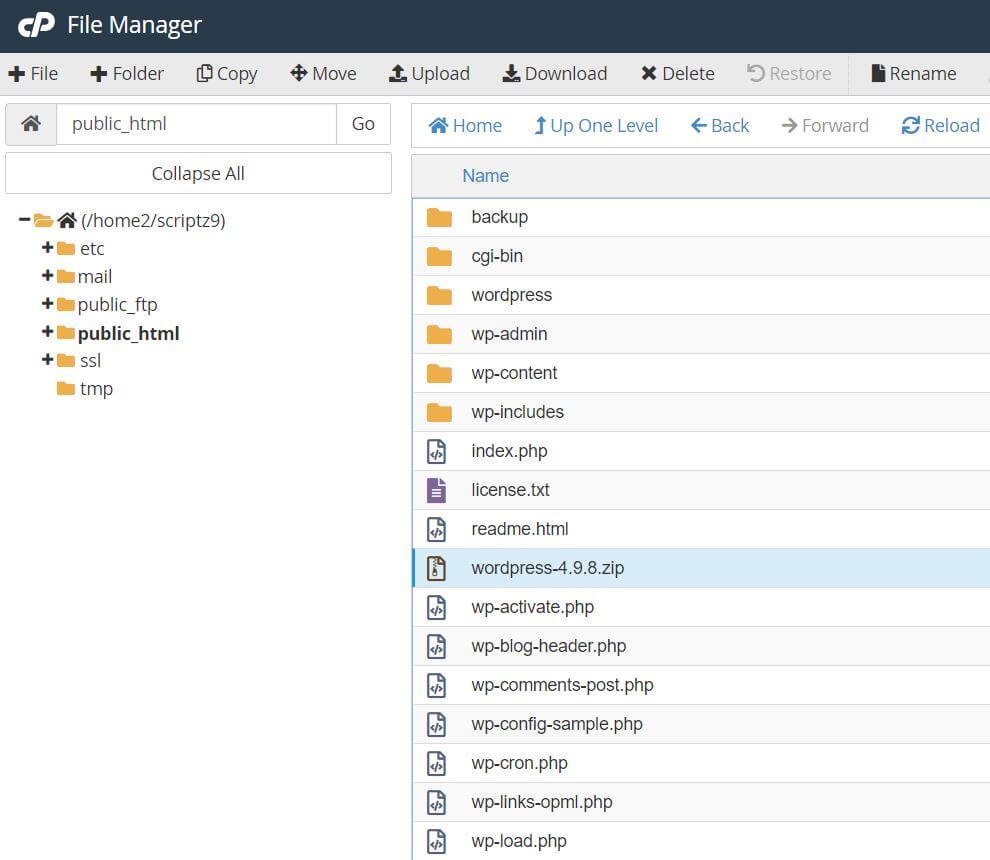
Next, upload WordPress zip by clicking the upload link. Extract WordPress zip right after the upload is done. You should see a folder "wordpress". Open that folder and move all the files to public_html. Your public_html should contain files like below.
From your browser enter your site URL for you to access the WordPress configuration page.
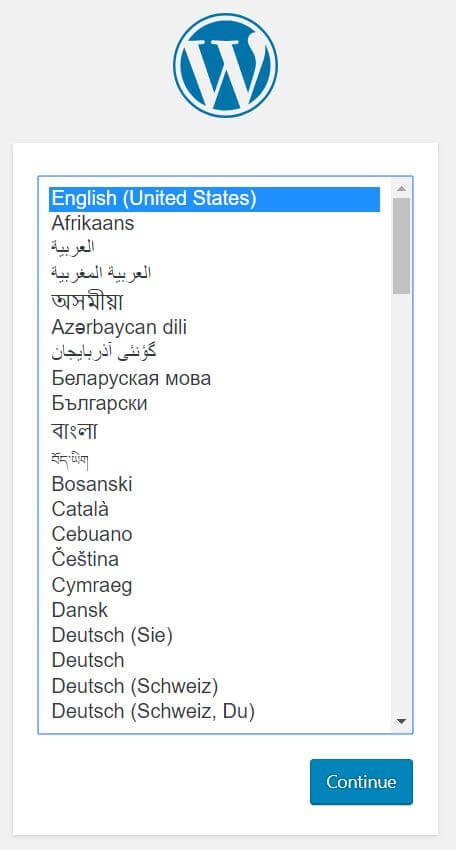
Select your language and click the Continue button.
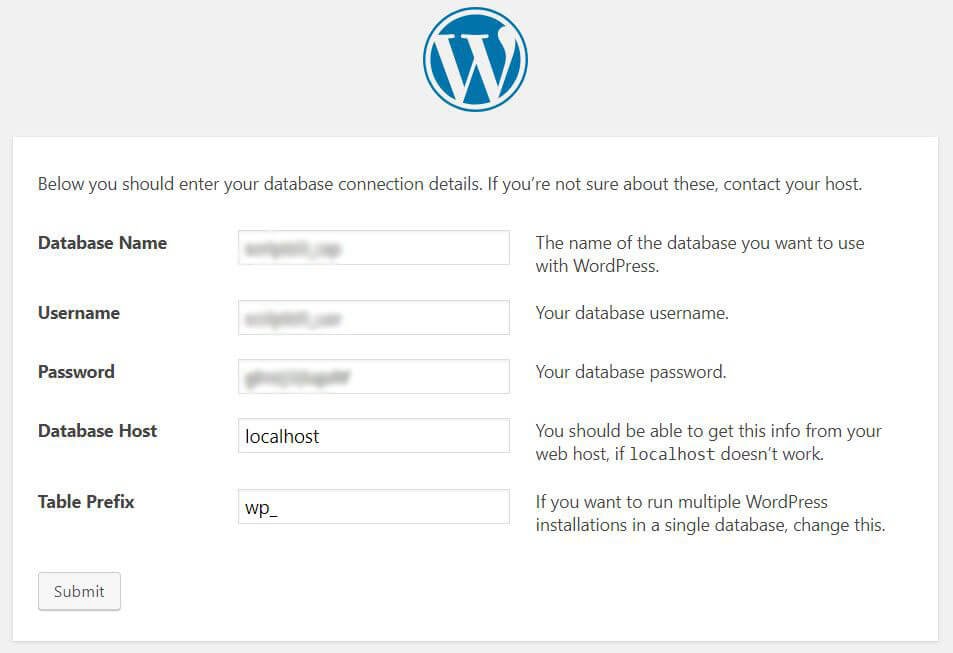
Hit the Let's go button to proceed (prepare your database details).
Enter your database connection details and submit.
You will be redirected to famous five-minute WordPress installation page.
Fill up the form and Click Install WordPress button.
We're almost done! Sign in once WordPress installation is done.
C. Launch WordPress site on Bluehost using All-in-One WP Migration.
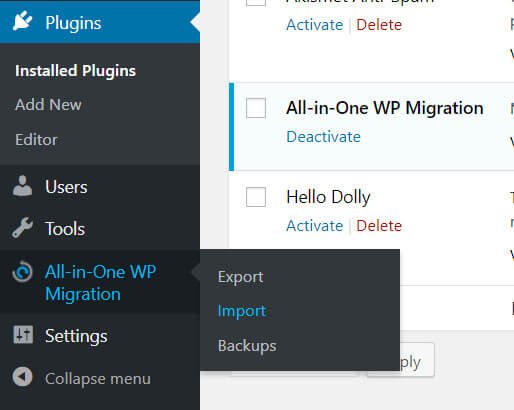
Again, to launch the WordPress site on Bluehost easily, install All-in-One WP Migration plugin first. If you don't have it yet, hover your mouse to plugins (located from left sidebar) and click Add New. Search for All-in-One WP Migration and click Install Now button.
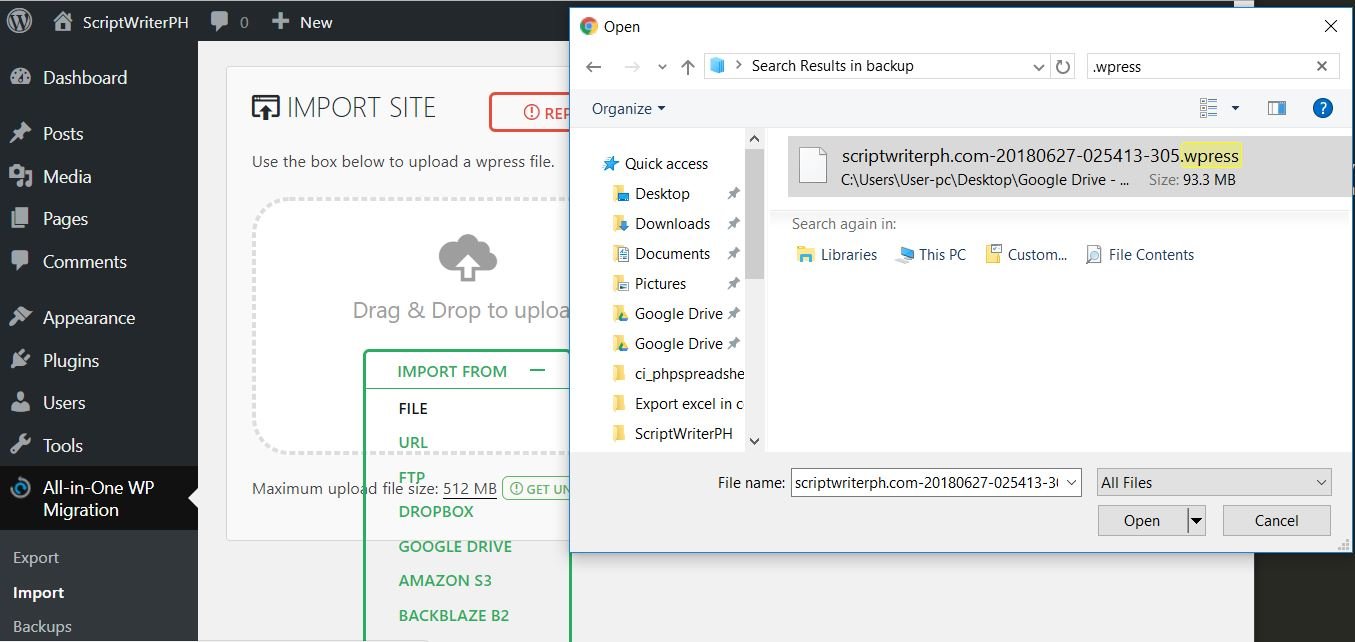
Activate the plugin once the installation is done. Now you should see All-in-One WP Migration from the left sidebar of your dashboard. To import your .wpress file (file that we've exported from Step 2) refer to the screenshot below.
A prompt message will appear once the import of your .wpress finished.
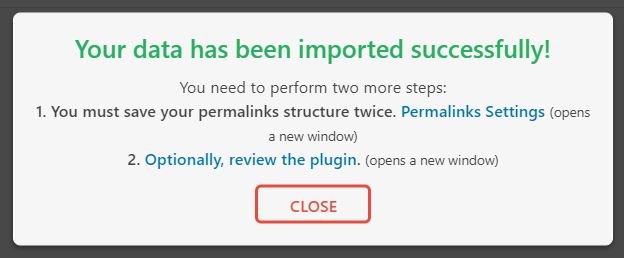
The import process will overwrite your website including the database, media, plugins, and themes. Click Proceed; do not close your window or the import process will fail. Once data has been imported you will see a message like this.
Go to permalink Settings and save your permalinks structure twice without changing anything. This's just to refresh your .htaccess file.
Go and visit your WordPress site (now it should be up and running).
Congratulations! You've successfully launched your WordPress site on Bluehost. You've also found out how easy to launch a WordPress site using All-in-One WP Migration plugin.
Not sure about launching your site on paid web hosting? You can try to launch your WordPress site on X10hosting – FREE web hosting for WordPress.
Step 5: After You Launch WordPress Site on Bluehost
It is good practice to do the following before you let search engine bots (crawlers) index your site.
Check if your site title and tagline are correct. After deploying a WordPress site, a common mistake is forgetting to replace WordPress default tagline "just another WordPress site". Also, check if your favicon is properly set.
Be your own site tester. Navigate to your site through links and buttons. Make sure your site doesn't have 404 errors. Look for missing images, thumbnails, or featured photos. You can also use Google Chrome Dev tools to see all failed to load resources.
Verify if all your forms (contact form, subscription form, etc.) are all sending an email.
Check if your blog posts can be shared on all major social media platforms such as Facebook, Twitter, and LinkedIn. A shared blog post featured image must be displayed correctly.
Setup Google Analytics to analyze your web traffic and for you to understand your audience.
Setup Google Search Console to monitor your site's presence and for you to be able to optimize your site's performance.
That's all. If there's something you want to add to our list, let us know from the comments below. We hope this article provides you enough information for you to be able to properly launch your WordPress site on Bluehost.








Leave a Reply
You have any questions or suggestions? Experiencing technical issues?
Please drop a comment, we're willing to resolve any issues and improve our solutions. Let's have a personal and meaningful conversation. 😀