")

4 Steps to Manually Migrate WordPress Site on Unmanaged Server
Last updated on February 20th, 2021
This article is written to share you the knowledge, and techniques to manually migrate WordPress site on unmanaged server. We'll walk you through the basic steps, and share you tools we've used to put our WordPress site live on unmanaged server.
Requirements to Manually Migrate WordPress Site
- Your WordPress site running on your localhost machine
- FTP credentials to be able to access your remote host as well as FTP solutions such as FileZilla or WinSCP
- Enough permission to your remote host to perform operations such as move and unzip file/s. You may need to use sudo command here ("superuser do" to be able to execute commands as root user).
- Terminal emulator such as Putty or Kitty to be able to connect to your remote host through SSH (You can also use your Windows default command line)
Step 1: Backup WordPress Files and Database
Before you manually migrate WordPress site on unmanaged server, you need to backup your WordPress files and database first.
Backup Your WordPress Database Using PhpMyAdmin.
Open your browser, go to http://localhost/phpmyadmin. Make sure your Apache and MySQL service is running.

Select your database.
After selecting a specific database, navigate to export tab.

You will see two options here 1. Quick - display only the minimal options and 2. Custom - display all possible options. Select Quick option if you don't need to do some configuration when exporting your database into a file.
Hit the Go button.
If you don't have PHPMyAdmin, you can backup your WordPress database manually using MySQL command.
mysqldump -u your_mysql_user -p your_wordpress_database > /path/to/folder/your_wordpress_database.sql
Keep your WordPress database SQL file for later use.
Backup your WordPress files by simply compressing them in a zip.
Don’t skip this step of backing up before you manually migrate WordPress site on unmanaged server.
Step 2: Upload WordPress Files and Database to Remote Host
You can easily upload your WordPress files and database to your remote host using FTP solutions such as FileZilla or WinSCP. In this article, we will use WinSCP.
Upload WordPress Files and Database Using WinSCP.
Launch WinSCP.
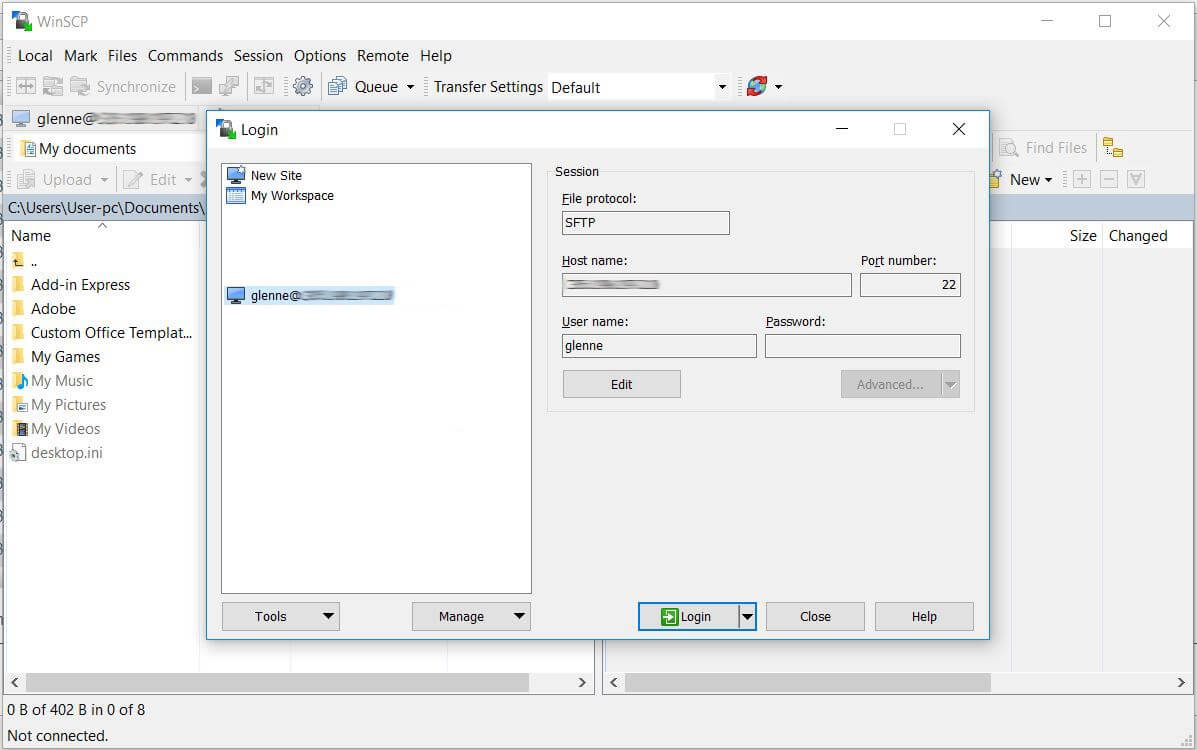
Add new site to your WinSCP. Enter your hostname, port number, and username. You may also need to add .ppk (private key file) here.
Hit the save button.
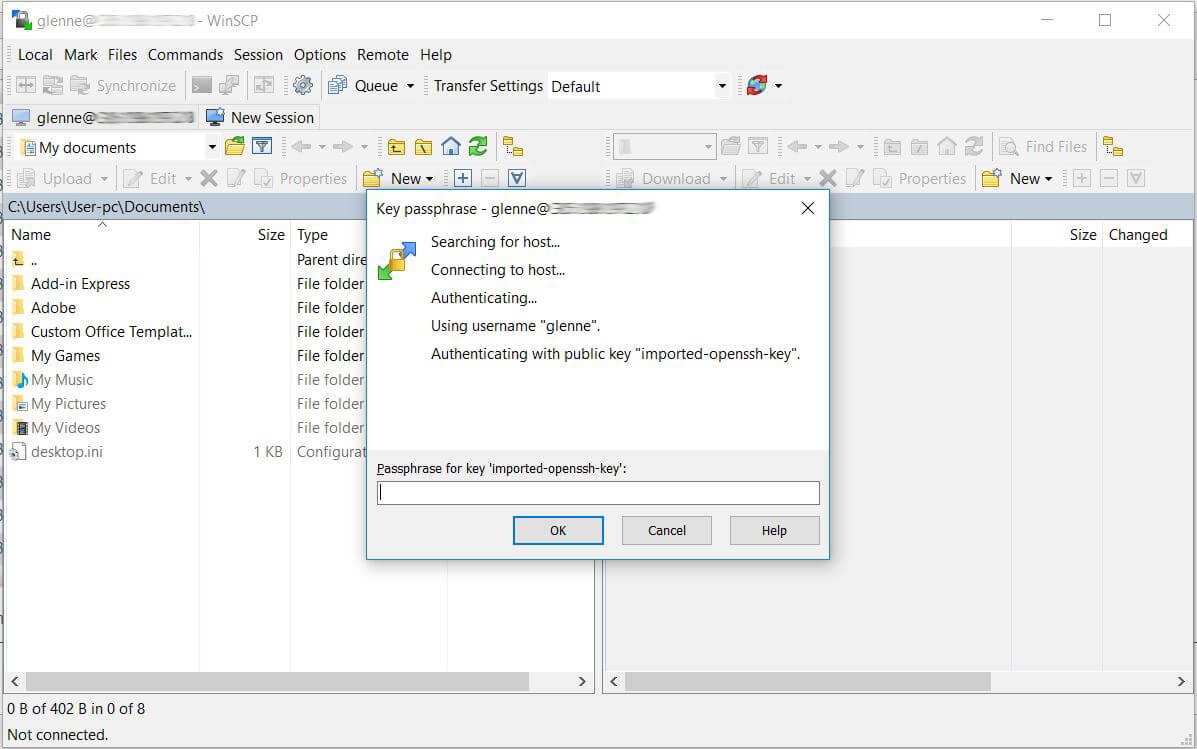
Now, login to your remote host. Enter your password when prompted.
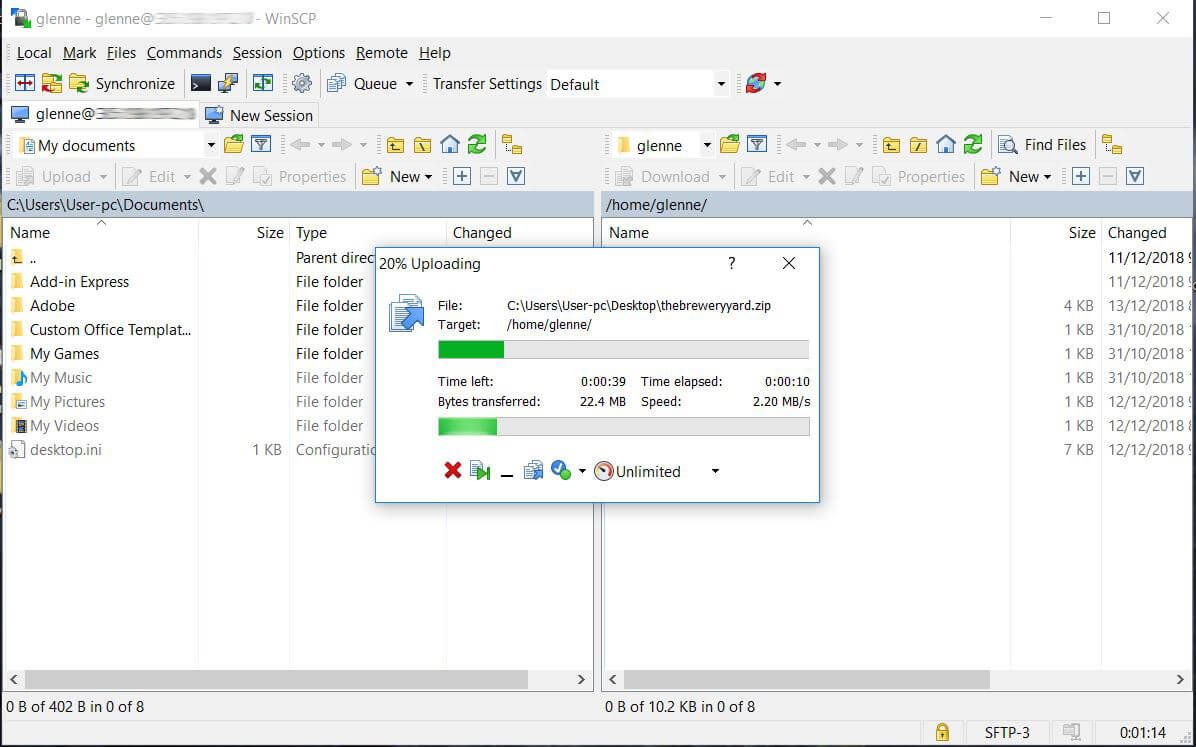
Upload your WordPress backup zip and WordPress database SQL file from your local computer to your remote host.
Upload WordPress Files and Database Using SCP Command.
If you don't have FTP solutions such as FileZilla or WinSCP, you can use SCP command to transfer your WordPress files from your localhost to your remote host. SCP (secure copy) allows you to secure copy your files from a local server to a remote server or between two remote servers. Here's how you use SCP command.
Open your terminal from your local computer.
SCP standard format when transferring files from a local computer to a remote host.
scp /local/path/to/your/file.ext remote_user@host:remote/path/to/your/folder/
Now, try to copy your WordPress backup zip from your local computer to your remote host. You may need to provide .pem (Privacy Enhanced Mail) file to be able to securely connect to your remote host. If you have .ppk instead of .pem, then convert your .ppk to .pem first.
scp -r -i /c/Users/User-pc/Desktop/my_host.pem /c/Users/User-pc/Desktop/thebreweryyard.zip glenne@my_host:/var/www/html/the-brewery-yard/

Next, copy your WordPress database SQL file from your local computer to your remote host.
scp -r -i /c/Users/User-pc/Desktop/my_host.pem /c/Users/User-pc/Desktop/wp_tby.sql glenne@my_host:/var/www/html/the-brewery-yard/
Did you encounter Permission Denied error when copying files to your remote host? Try to change the path of your remote host to "~/" (your user root directory), then move it later to /var/www/html/your_wordpress_folder/.
From your terminal, connect to your remote host. Move your WordPress backup zip from ~/ to var/www/html/your_wordpress_folder/. You may need to use sudo command here.
sudo mv ~/your-wordpress-backup.zip /var/www/html/your_wordpress_folder/
Decompress your WordPress backup zip using unzip command.
sudo unzip /var/www/html/your-wordpress-folder/your-wordpress-backup.zip
Take note the location of your WordPress database SQL file for later import.
Step 3: Create Database and User with MySQL Command
All the operations below will use MySQL command.
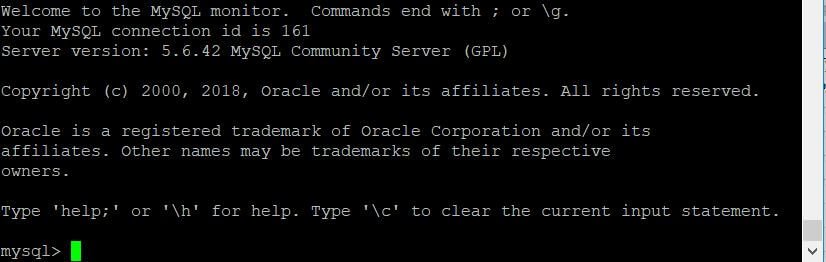
Open your terminal emulator such as Putty or Kitty (or Windows default command line) and connect to your remote host. Run the command mysql -u your_mysql_user -p to login to your MySQL. Enter your MySQL password when prompted.
![]() Upon successful login, you should see your MySQL connection ID and your server version.
Upon successful login, you should see your MySQL connection ID and your server version.
Create database for your WordPress site.
CREATE DATABASE your_wordpress_database;
Check if your database has been created.
SHOW DATABASES;
Create a MySQL user that will manage your database.
CREATE USER 'your_mysql_user'@'localhost' IDENTIFIED BY 'password';
Grant privileges to your MySQL user.
GRANT ALL PRIVILEGES ON your_wordpress_database.* TO 'your_mysql_user'@'localhost';
Verify that your MySQL user has enough privileges on your database.
SHOW GRANTS FOR 'your_mysql_user'@'localhost';
Quit MySQL.
quit;
Now, import your WordPress database SQL file.
mysql -u your_mysql_user -p your_wordpress_database < ~/path/to/your_wordpress_database.sql
Check whether you have successfully imported your WordPress database SQL file.
Login again to your MySQL.
mysql -u your_mysql_user -p
Use your WordPress database.
use your_wordpress_database;
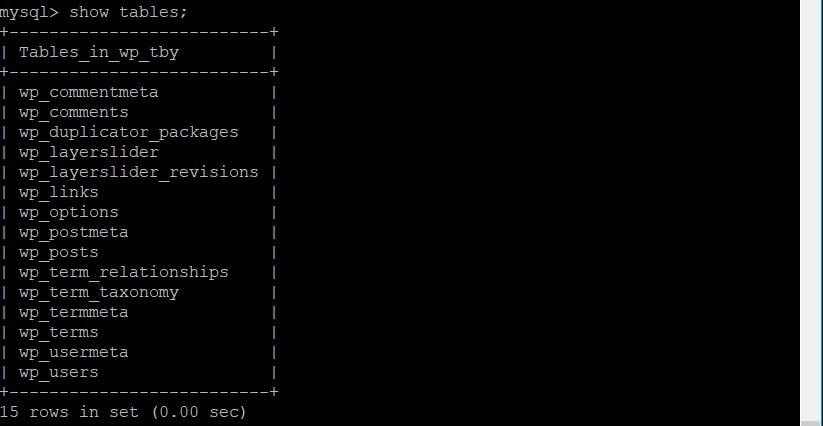
Display all tables from your WordPress database.
show tables;
Step 4: Configure Database Settings
This is the last step to manually migrate WordPress site on unmanaged server.
Go back to your WinSCP. Navigate to your WordPress project folder then open wp-config.php file -- WordPress base settings. Update the following constants:
DB_NAME
DB_USER
DB_PASSWORD
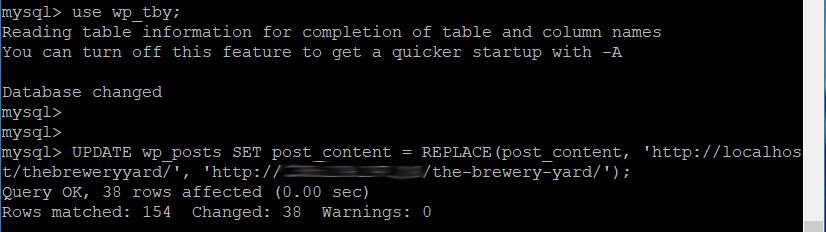
Lastly, replace all the links from your posts table.
Login to your MySQL.
mysql -u your_mysql_user -p
Then use your WordPress database.
use your_wordpress_database;
Replace all the links from your posts (wp_posts) table.
UPDATE wp_posts SET post_content = REPLACE(post_content, 'http://localhost/your_wordpress_site/', 'http://your_remote_host/your_wordpress_site/');
You should see number of rows (links) changed after running the above command.
By now your WordPress website should be up and running; open a browser to check it out. Test everything, navigate to your site through links, menus, and buttons. Look for missing photos, thumbnails, or featured images from your site. You can also use Google Chrome Dev tools to see all failed to load resources.
Not sure about launching your site on an unmanaged server? You can try to launch your WordPress site on X10hosting – FREE web hosting for WordPress.
If you need a dedicated web hosting server for your site. Check out Bluehost, the most reliable web hosting server for WordPress. You can follow our ultimate guide here on launching WordPress site on Bluehost and get 63% off.
That's all! We hope this tutorial helped you to manually migrate your WordPress site on an unmanaged server.
Thanks for the terrific guide