

JL Token - Queue Management System Review 2021 - Why JL Token?
Last updated on April 26th, 2021
Summary
JL Token - Queue Management System in a Nutshell
JL Token Features and Functionalities
Steps to Install JL Token (with setup wizard)
JL Token Pros and Cons (is it worth my money?)
JL Token - Queue Management System in a Nutshell
JL Token is a web-based token queue management system developed by Justlab technologies (also known as justlabtech) to ease the process of organizing queues.
It is an electronic-based ticketing system, modernized to provide all in one queue management system solution. A project that might help you to make the most out of your business by improving customers queuing experience.
Here's how it works.

1. Kiosk will dispense a printed token number. You let your customer take care of getting His/Her token number by interacting with a Kiosk machine. Your customer will interact with a Kiosk to select the respective department He/She needs to transact with. Next, your Kiosk will generate a printed token number based on the customer's selected department. Then, your customer will get the printed token number and go to the waiting area.
2. Token numbers will be displayed on a TV screen. In the waiting area, you have a TV screen to display the currently serving token number. Token display screen will be automatically updated upon calling a token number. An audio voice (verbal announcement of the token number) will be played so it will be heard by customers.
You may ask, is it possible to deploy this project in a local environment (not connected to the internet)? Short answer: Yes; But, the voice feature won't be available on your queue management system -- no verbal announcement of token numbers. JL Token uses ResponsiveVoice JS text-to-speech library for voice feature. This library requires internet connection to operate. If you badly needed the verbal announcement feature, replace ResponsiveVoice JS with Web Speech API speech synthesis. This way you can enable the voice feature on your web project without an internet connection. You may follow this tutorial on enabling text-to-speech offline in a web project using Web Speech API speech synthesis.
3. Staff will call the token number next in line. Your staff will be responsible to call (by just clicking a button) the token number next in line. Each staff will login to the system to be able to view the queue and call the token numbers.
JL Token provides a really complete customer queue management system solution. From Kiosk screen (for printing token number) to Token display screen (to see the currently serving token numbers). JL Token also has admin area for staff and administrators. The staff has the privilege to monitor the queue and call a token number. An administrator controls the overall functionalities of the system (e.g. profile settings, department, counter and user management, view reports, and many more).
JL Token vital information:
- Technology used: Laravel (5) framework, JavaScript, HTML, CSS, PHP, MySQL
- Current version: 2.5
- Last Update: July 24, 2019
- Date created: August 5, 2016
- Envato Rating: 4.0 / 5 (14 voters)
- Has been bought 269 times (as of today)
- Item price: $49
JL Token - Queue Management System Features & Functionalities
Web-based platform - you only need a web browser to access the system. You can just simply install JL Token - Queue Management System on your local server. Then multiple users and devices connected to your local network will be able to access the system at the same time.
Easy to install - install JL Token in a couple of minutes with setup wizard. You just need to upload and extract a zip file on your server, access setup wizard from a browser and follow the steps required.
Admin and staff user roles - by default, JL Token has 2 user roles available. Staff - user role for tasks such as queue monitoring and token number calling. Staff user also has the privilege to issue token number and change notification text (text on the token display screen). Admin - user role to access all modules of the system. Only admin has access to Dashboard's report and any other reports available in the system. Admin users can also manage users, departments, and counters.
Verbal announcement - supports text-to-speech clear and high-quality verbal announcement, in five different languages.
JL Token - Queue Management System Requirements
- PHP >= 5.6.4 (to check PHP version of your web server, go to cPanel or connect to your web server through SSH and run php -v command)
- OpenSSL PHP Extension (to list all installed PHP modules of your web server, connect to your web server through SSH and run php -m command)
- PDO PHP Extension
- Mbstring PHP Extension
- Tokenizer PHP Extension
- XML PHP Extension
Steps to Install JL Token - Queue Management System
Step 1: Download JL Token - Queue Management System Zip File
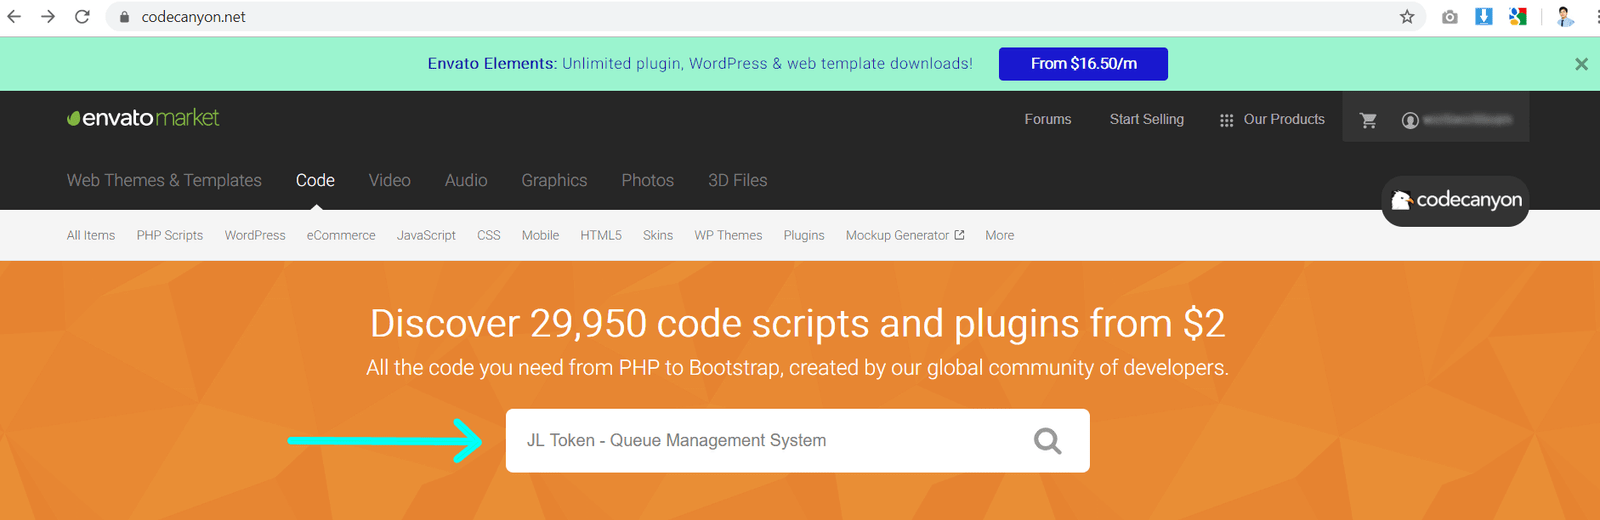
Sign in to Envato here (don't have Envato account yet? Create your Envato account here first).
After signing in to Envato, you'll be redirected to the Envato market where you can discover numerous code scripts and plugins. See the big search bar at the center of the page? Search for "JL Token - Queue Management System" and hit the search icon.
You should see this JL Token - Queue Management System by justlabtech in Php Scripts from search results.
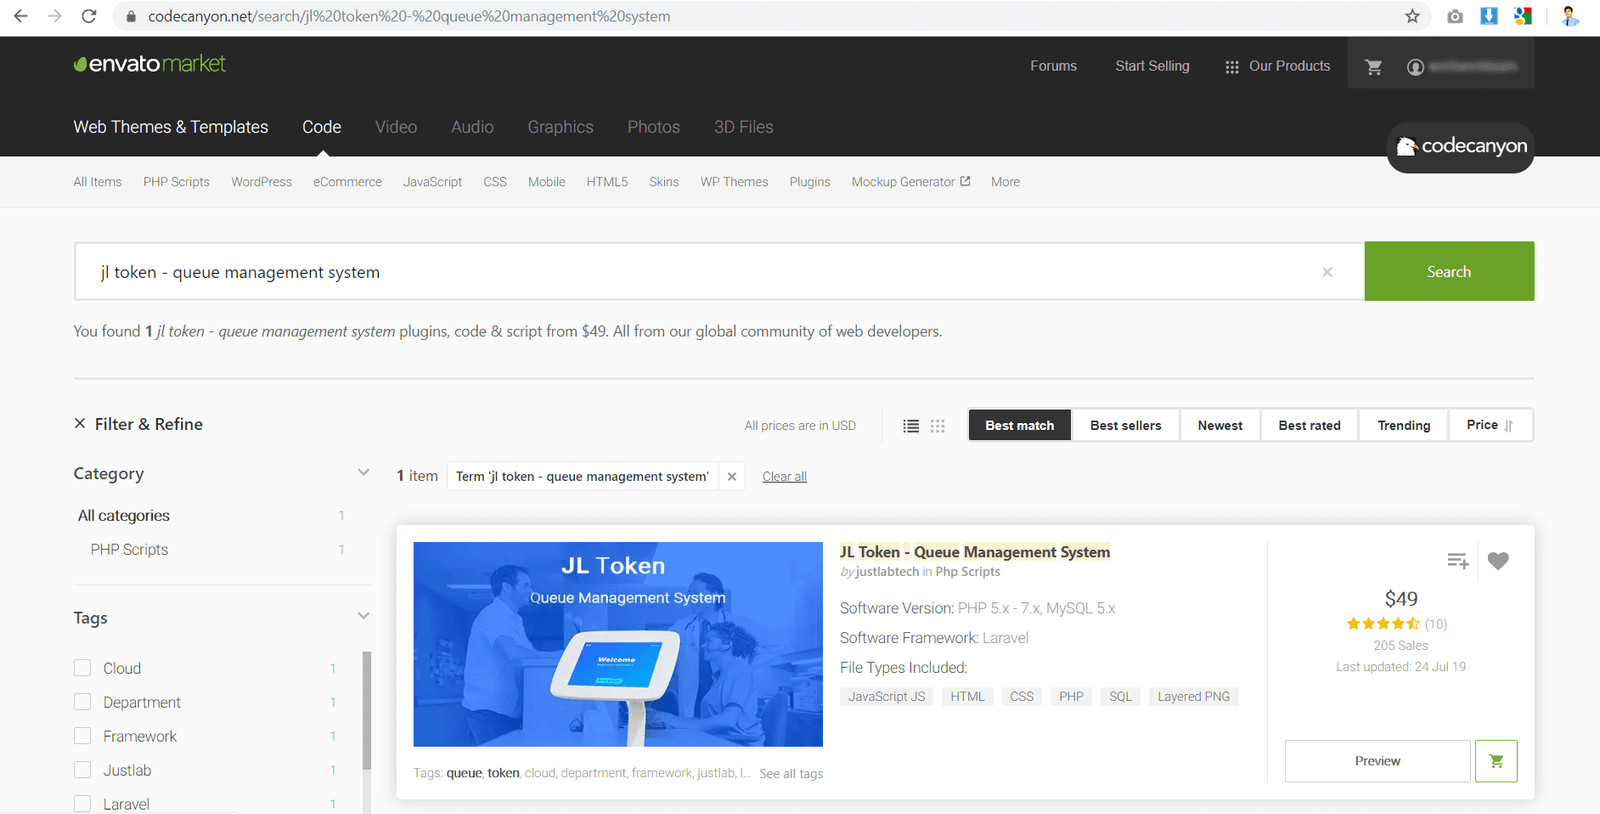
Click the thumbnail or the product title to view the product details. Read the product description thoroughly. You may also click the Live Preview button to try the system itself.
To buy the product click Buy Now. When buying this product you're free to select the payment method you want. You can make payment through Visa, PayPal, or Skrill.
After making the payment, go to your profile and select downloads. Now download JL Token - Queue Management System zip file.
Step 2: Access JL Token - Queue Management System Setup Wizard from Your Browser
In this tutorial we'll setup JL Token first on our local server (Windows) then we'll push it to Gitlab.
Move JL Token zip to your local web server (e.g. /c/wamp/www/jl-token-queue-management-system) and extract it.
Open a browser and navigate to your project's installer page (e.g. http://localhost/jl-token-queue-management-system). You should see the setup wizard page of JL Token.

Click next to begin the process of setting up JL Token - Queue Management System.
Step 3: Finally, Install JL Token - Queue Management System using the Setup Wizard
Upon clicking the next button, you will see your system's Environment Settings. See the text area containing JL Token - Queue Management System configurations (app, database, mail)? For now, we only need to update the App URL and database settings from it. Replace values of the following: APP_URL, DB_DATABASE, DB_USERNAME, DB_PASSWORD.
Hit Save .env button to save your configuration, the setup wizard will automatically update your .env file.
Click Next to proceed to requirements verification.

The setup wizard will automatically check if your server meets the system's requirements. To be able to run JL Token - Queue Management System on your server, you'll need to enable the following PHP modules: OpenSSL, PDO, Mbstring, and Tokenizer. A green check indicates that the PHP module's already enabled.
Click Next to proceed to file permission checking.
For JL Token - Queue Management System to function correctly, it should have permission to write to the following folders: Storage/app/, Storage/framework/, Storage/logs/, Bootstrap/cache/ and Assets/files/.
You can change permission for each folder using the below command (do this only if you have incorrect folder permissions).
chmod -R 775 storage/app/
chmod -R 775 storage/framework/
chmod -R 775 storage/logs/
chmod -R 775 storage/app/
chmod -R 777 assets/files/
All good with the folder permissions? Click the Install button to install the application to your server. You should see a message "Application has been successfully installed". Now hit the button Click Here To Exit (You'll be redirected to JL Token - Queue Management System login page). Use the default admin credential of this project. The username is "admin" and the password is also "admin".
You're Done! You should be redirected to JL Token - Queue Management System's dashboard upon successful login.
(this step is optional)
Step 4: Setup Git for JL Token - Queue Management System
You want to white label everything and re-brand this project right? Before you do that, we suggest you set up git for JL Token first. We'll do an initial commit and push this project to Gitlab before we customize any part of the project.
It is a good practice to have a version control system for a project like this. We strongly suggest you use Gitlab (one of the best web platforms for hosting project source codes). It is more than just a git-repository manager. Read more about Gitlab here.
To set up your Gitlab project you must sign in first to Gitlab here (don't have Gitlab account yet? Create your Gitlab account here and tap the Register tab).
Create your very first project after creating your Gitlab account.
If you're using Windows, you need to perform an extra steps to be able to use git on your computer. Download and install Git Bash on your computer. It is an application for Windows operating system which gives you the capability to emulate git command.
Run Git Bash after installing. To do the initial commit and push the project to Gitlab, enter the following commands.
cd your_project_folder
git init
git remote add origin git@gitlab.com:YourGitlabUsername/your-gitlab-project.git
git add .
git commit -m "Initial commit"
git push -u origin master

Good job! Now go back to your browser. Sign in to Gitlab and navigate to your newly created project. Reload the page, now you should see all the folders and files of this project successfully uploaded.
JL Token - Queue Management System Pros & Cons
JL Token Pros
Lightweight and fast. This project doesn't do CDN or linking to external resources. Images, JavaScript, and CSS files stored locally (and is also minified). The well-structured database tables make querying so efficient and fast. The whole project is only 33MB in size.
Customizable source code. Source code is so customizable you can use it on any other future project that requires a queue management system. Typing centers? banks? hospitals? clinics? libraries? you name it.
Mobile responsive by default. Whether you're using a desktop, tablet, or smartphone to access the system it doesn't matter. JL - Token's responsive layout will adapt to the screen size of your device.
Helpful data report. Dashboard's report contains the following helpful data: Today queue, Today missed, Today served, Today overtime, queue details, and the today vs yesterday comparison.
JL Token Cons
For this review of JL Token - Queue management system we don't state only the good and positive stuff about the project. We also want to point out things we can improve. While using the project we experienced some minor issues (that surely can be improved!).
Weird behavior when setting up the project. Setup wizard strangely deletes .env file and /app/config folder upon finishing the installation. We tried installing JL Token - Queue management system on our localhost (Windows) and on our staging server (Linux). Upon finishing the installation, the setup wizard (somehow) deletes .env file and /app/config folder. This happens all the time (not sure why). So, what action did we take? We restored .env file and /app/config folder manually. You'll find .env file and /app/config folder from JL Token - Queue management system zip file that you have downloaded.
This project doesn't leverage the use of .env file. Laravel .env file contains various settings of the system such as database, mail, etc. Laravel normally uses .env if it exists inside the project folder. Seems like this project doesn't really use .env as environment settings storage. Try to open the project .env file, change database details to something incorrect. Go to your browser and reload the project. The project will still run smoothly like nothing was changed. Here's what really confusing. I've discovered that almost all of the project's system settings stored in /bootstrap/cache/config.php file. We couldn't understand why Justlabtech decided to put config.php file inside of the bootstrap cache. What action did We take? We tweaked settings from /bootstrap/cache/config.php file instead of .env. We setup git for this project and added /bootstrap/cache/config.php to .gitignore file.
Now that we have the knowledge and transparent facts about JL Token - Queue Management System. Let's answer the question "Is it worth my money to buy JL Token - Queue Management System"?
The answer may vary but in our case, We would say "definitely YES".
You can say it is worth your money to buy this project if:
- It meets your project requirements (most of your project requirements if not all).
- You can customize the project (for other future use). If not by yourself at least by someone else you know. Maybe one of your team members knows how to code. JL Token - Queue Management System is made with Laravel framework and uses PHP, HTML, JavaScript, and CSS. You can learn those easily by just Googling and watching YouTube tutorials.
Final Words
Now you have detailed information on JL Token – Queue Management System. You know now how it works, the technology it uses and all the requirements needed to run the project. We’ve also shared with you the features and functionalities of JL Token that make it valuable in the Envato marketplace.
We bought the project and it is truly worth it.
Remember that if you're required to deploy this project in a local environment, and if you want to retain the verbal announcement feature, you have to replace ResponsiveVoice JS with Web Speech API speech synthesis. You can always refer here to enable text-to-speech offline in Laravel with Web Speech API speech synthesis.
Justlab technologies continue improving JL Token. So always check for updates (for added features, bug fixes, etc). That’s all! Explore the project itself and learn more from it. Happy coding!
Leave a Reply
You have any questions or suggestions? Experiencing technical issues?
Please drop a comment, we're willing to resolve any issues and improve our solutions. Let's have a personal and meaningful conversation. 😀